How to read these blogs....

HOW TO READ THESE BLOGS...

In most cases, I don't write the recipes, I tell you how it went, what to be aware of, how to make them or, maybe even make them better. Sometimes I just want you to understand why I came to the decision to toss the puppies! That said, reviewing the recipe as you read my blog should be the most enlightening way to make sense of it all. It definitely will answer questions and help you avoid the same mistakes I made....and I always make some. Error goes hand in hand with the trial part of the process. Embrace it! Because you can't avoid it. Errors are the 'cracked eggs' of the soufflé. Now let's have some fun...

(fyi YELLOW FOLDER recipes are 'Keepers'...watch for the YF tag accompanying these recipes)

Sunday, August 14, 2011

Peaches n’ Cream French Toast


Peaches n’ Cream French Toast (2-3 servings)

This has been our summer to Snooze! Nope, I don’t mean sleeping in, I mean eating out! Family and friends have been comparing their most often ordered dishes from our new favorite breakfast joint, Snooze (several locations in the Denver area). If you haven’t been, you better go, because it’s delish’. And while you know we’ll return again ...occasionally we like to cook in on a Sunday morning, and so...we decided to attempt the recreation of one of our favorite dishes-Peaches n’ Cream French Toast.

While this might not be exactly the way the Pro’s at Snooze pull it off, I think you’ll love the results. Yes, there are a few steps, but no-it’s not hard! A little planning and perhaps a little help manning the griddle and you can pull this off before your second cup of coffee-really!

The basic idea here is two slices of French Toast, with mascarpone and peaches in between, topped with whipped cream and sprinkled with a sweet crumble topping. See? Not complicated...but with a few tweaks we’ll make it extra special!

Tips...before we start: We used basic Texas Toast (available by the loaf at King Soopers). Nothing fancy, just thicker than your usual white bread. Want to make it special? Use a loaf of Challa bread (pronounced ‘halla’) cut into thick slices. You may have to call around to find a bakery that makes it, but it’s soooo worth it!

Sweet Crumble Topping

Mix together in a small bowl 2 tablespoons each of:

  • uncooked oatmeal
  • flour
  • sugar
  • brown sugar

add ¼ teaspoon cinnamon, mix

add in 1 ½ tablespoons softened butter and mix it altogether with your fingers until it forms small pea-sized pieces.

Spread the mixture out on aluminum foil on a cookie sheet and broil for 4-5 minutes, until the butter is melting and the consistency is less lumpy--watch closely toward the end so it doesn’t start burning! Remove from the oven and Cool , then crumble and set aside in a small bowl.

Caramelized Peaches

Drop 2 ripe peaches into a bowl of very hot tap water.(TIP: hot water helps to separate the skin from the pulp, making peeling easier.) Let them set for about a minute. Pull out one at a time, peel with a knife, then cut off the fruit from the stone into appx. ¼ inch slices.

Melt in a pan:

2 tablespoons butter

Add:

Peach slices and sprinkle with 1 teaspoon sugar and 1/8 teaspoon cinnamon

Cook until peaches start to brown on the sides (that’s caramelizing!) then set aside.

Before making the toast, we’ll prepare the mascarpone and whipped cream mixtures so you’ll be ready to put it all together quickly in the end...

Mascarpone Filling

Whip together:

  • ½ cup softened Mascarpone
  • 1 Tablespoon Powdered Sugar
  • Dash of Half and Half

Whip this JUST until it’s smooth and creamy-don’t over whip or it will start to separate...not that it isn’t still perfectly yummy...just not as pretty.

Whipped Cream Topping

Whip:

2/3 cup whipping cream until it just starts to get firm.

Add:

  • 2 Tablespoons Powdered Sugar
  • 1 Teaspoon vanilla

Continue whipping until it’s all incorporated and it gets the thickness of warm pudding-DON’T whip until it’s forming hard peaks-you want it runnier.

French Toast (2 slices per person)

Mix:

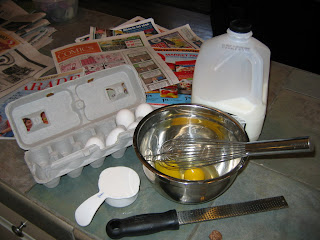
  • 3 eggs
  • 3 cups milk
  • 2 tablespoons vanilla
  • 1 teaspoons cinnamon (more if you like it cinnamony!)

Dip Texas Toast into mixture-don’t pull it right out, coat it completely and give it a few seconds (not too much but...) to absorb some liquid.

Cook: I cook my French Toast on a griddle set to about 350 to 375 degrees-up it to the higher amount if you feel it’s not getting crispy around the edges. Flip after a few minutes-brown the other side (don’t under cook because those crispy edges are part of what’s so good about French Toast!).

Plate:

Place one piece of French Toast on your plate. Top with a generous dollop of the mascarpone mixture (it WILL start melting-that’s okay), top that with several caramelized peaches, then place the second piece of French Toast on top, and top that with generous dollop (or two) of the whipped cream mixture and sprinkle liberally with the sweet crumble topping. That’s it-easier than you thought, huh? Even better once you taste it-yum! Pour that second cup of java and Enjoy!

Sunday, March 27, 2011

Fettuccini Alfredo


For years I made my own version of ‘Alfredo’ sauce based on a roux (flour based sauce) that my mother always used for her Chicken Tetrazzini dish. It is a wonderful dish and the kids love it...but we’ll go there another day. Today we’re in search of a classic Alfredo sauce.

Never completely satisfied with the results when I tried to translate that old recipe to a classic Alfredo dish, I finally gave in and did some research. Imagine my delight when I found out that the classic Alfredo sauce is surprisingly simple-I mean easy! But, sadly, it can also be VERY high in fat, and, well, frankly, kind of bland. But of course, I love a challenge!

My new version, gleaned from the bits and pieces of the many recipes I found, sticks to the simplicity of the original, but, as Emeril Lagasse would say, kicks it up a notch! So, BAM! Here you go!

Fettuccini Alfredo (serves 2)

Ingredients:

1/2 lb. Fettuccini

3 Tb. Butter

2 cups Half and Half (classic Alfredo uses heavy cream-don’t you feel thinner already?!)

1 1/2 Tsp. chopped Garlic

1/2 cup white wine (think Riesling or Pinot Grigio-avoid Chardonnay, I am no fan of the stuff and it generally leaves a bad aftertaste in cooked food. Yes, you can make this without the wine, and really, don’t you know the alcohol cooks off by now? But a complexity of flavor remains.)

1 1/2 cups shredded or shaved Parmesan (Use grated if that’s all you have. Fresher is better-the larger and fresher the pieces, the stronger the taste on your pasta. This is one place where the ‘good stuff’ really pays off!)

1/2 cup chopped Italian Parsley

Salt and Pepper to taste (go light on the salt until you HAVE tasted it-remember, once you go salty, there’s no going back! But if you like pepper, don’t be shy!)

Optional: 1/4 Tsp. crushed red pepper (this is for the folks who love all things spicy!)

Melt the butter in a 10 or 12 inch saucepan over medium low heat. Add cream and wine, stir and simmer for a few minutes to heat, then add the garlic, salt and pepper. Bring to a boil then simmer until the volume reduces down by about a third to half-it will be thicker, and easily coat a spoon (see picture). DON’T do this on high heat, stick to medium and stir regularly. It will take about 10 minutes. I know, we’re all taught to that we shouldn’t let milk come to a boil or it will curdle...no worries here, just stick with the easy simmer and don’t overdo it.

Meanwhile...once the sauce is bubbling, you can get your pasta cooking. Remember to salt your water, and follow package directions. In high altitude, you will need at least a couple extra minutes in the boiling water to get to the right amount of al dente-just keep tasting in the last 2-3 minutes and you’ll get the hang of it!

Once your sauce and pasta are ready, drain the pasta, pour the sauce over it and toss lightly, then divide the fettuccini into two pasta dishes. Sprinkle half of the parmesan on top of one dish and the rest on top of the other. Ditto the Italian Parsley. I like one last fresh grind of pepper as well-you may too!

Pour yourself of glass of that wine, accompany with some garlic bread and a salad. Enjoy!

Optionals....because this is the kind of recipe that begs to be messed with!

Want Chicken Alfredo? Pick up a Deli chicken at the store, tear off some white and dark meat (a mix is nice-about 2/3 to 1 cup total, depending on your tastes) and toss it in the sauce shortly before serving-just long enough to warm it up-not too long or it will start to separate and get mushy (technical cooking term there!). FYI you'll note I added chicken in this dish and you can see it added in in the photo with the coated spoon. Other mix-ins might include peas (toss in frozen peas to heat) or steamed sliced asparagus. Really, let your imagination and taste buds lead the way!

Friday, February 25, 2011

Let There Be Cake...and Frostings, Too!


I know what you’re thinking. I’ve raised three boys and I’ve made a lot of cakes over the years, and I’m still using boxed cake mixes?! Yes, and I’m not ashamed to admit it. And yes, this is the first Tinker Bell cake I’ve ever made, but when your granddaughter turns three-it’s time for a serious ‘little girl’ kinda cake. And the little girl in me sure enjoyed making it!

Despite the challenge of living at altitude (6000ft), I have braved the ‘from scratch’ cakes, and I’m pow-wowing with the experts in the hopes of bringing you a somewhat reliable version in the near future; chocolate, of course. Scratch cakes come with a wonderful density and more complex flavor than anything in a box can promise. But those boxes can be counted on to bring you consistent enough results, the kind you need to give you a smooth, flat surface for decorating with fairies, dump trucks, gummy worms...whatever your little one’s heart desires!

Still, I draw the line at the cake. There’s no excuse to ever buy a Can-o-Frosting again! Frostings (aka Icing) are so simple to make and so much more delicious to eat. So back away from that can, here are a couple of great do-it-yourself frostings and some ideas for putting them to good use!

If you’ve ever watched Semi-Homemade with Sandra Lee (http://www.semihomemade.com ), you get the idea. We take the easy part-the box-and then we do a little something ourselves to create a cake that makes you forget about that New Year’s resolution and spring for a second slice.

The Tinker Bell cake started with a boxed Strawberry Cake mix. If you live at altitude, follow the high altitude directions. If you can’t find Strawberry Cake, or you’re feeling lucky, here’s a quick do-it-yourself version which is probably even better:

Alternate Strawberry Cake: Using one box of White Cake mix, reduce the liquid by 1/3 cup, add all other ingredients called for, PLUS 1 cup strawberry preserves and 1/8 tsp. red food coloring. I would recommend also making some altitude adjustments per the box, if that’s necessary, as this one can be tricky. Just remember, when the center of a cake falls a bit, that’s what icing is for!

Okay, now let’s make it really special with homemade frostings. These two versions will serve you for many purposes. The Cream Cheese is awesome on Carrot Cake as well, and the Chocolate is standard practice for topping all my brownies. It’s also good between graham crackers, in a pinch.

Cream Cheese Frosting:

Mix the following ingredients all together in a bowl until smooth and soft:

8 oz. cream cheese, softened (leave it out of the fridge for about 30 minutes)

6 Tb. butter (unsalted is great, but not necessary)

4 cups powdered sugar

2 tsp. vanilla

1 tsp. lemon juice (cut a wedge and give it a good squeeze into the bowl-that should do it-watch for seeds!)

1-2 Tb. milk-Optional. Add this only if you feel your frosting is a little too thick to spread smoothly.

Creamy Chocolate Frosting: (this comes to us from Anne Byrn’s cookbook, Chocolate From theCake Mix Doctor. (http://www.cakemixdoctor.com/) Byrn has literally written the book-or books on tweaking boxed cake mixes to make wonderful creations that exceed any box’s expectations!) This is enough for brownies, but for a cake, I’d double it.

Mix the first 4 ingredients-start slow, or you’ll have cocoa powder flying everywhere!

3 Tb. butter (room temperature)

3 Tb. unsweetened cocoa powder

1 Tb. light corn syrup

1 tsp. vanilla

After you’ve mixed these together (it will be kinda thick) add and mix until smooth and spreadable:

1 cup powdered sugar

2 Tb. milk

Tinker Bell Cake:

For the Tinker Bell cake, I used the chocolate frosting for the center (use it all-you want a thick layer), and then frosted the rest of the cake with the cream cheese frosting. I reserved about 1/2 cup of the cream cheese for decorating. I added green and yellow food coloring to the reserved frosting and then piped those little vines here and there. If you don’t have piping equipment, put it in a small baggie and snip off one bottom corner-instant piping tool!

I used pre-made store bought candy flowers at the end of each vine, and a colorful silk flower for Tink to sit upon. I cut the stem down to about 2 inches and slipped it into a cut off piece of a straw before sticking it into the cake. Tink’s small friends easily sat in the frosting, but Tink was a bit tippy...a problem that was solved by a drop of hot glue on her little behind before she sat down on the flower. (Yes, it peels off later and no fairies were hurt in the making of this cake!)

That’s it! We served the cake with Chocolate Chip Ice Cream-Yummm! Now go, make cake! J

Monday, February 14, 2011

Aunt Kay’s Dutch Baby Pancake (YF)


This recipe came from my Aunt Kay who lives in Hawaii. She recommends that these be preceded by 'well iced Bloody Mary's' and served with 'chilled champagne'! One of the many reasons why I love 'Mama Kay'!

When I was little we used to go to a Swedish restaurant that made something like these for Sunday breakfast. They filled the middle with apples, which is fine. But I'm a purest and love the simplicity of powdered sugar and lemon. The Original Pancake House makes a Dutch Baby that's very much the same, and comes with an accompaniment of whipped butter, lemon and powdered sugar: http://www.originalpancakehouse.com/phm_specialties2.html Makes me wonder if they were spying on my Aunt all those years ago...hmm. However, if you are hooked on those pancakes but don't have an hour to wait for a table on Sunday morning, this is the recipe for you!

I've been making this recipe for a very long time-long enough to do in a couple of favorite pans! The ideal pan is a 12 inch stainless steel--no non-stick coatings or plastic handles. All-Clad makes the pan of my dreams: http://www.all-clad.com/collections/Stainless-Steel/frypans.htm?index= ...but until my ship comes in, I'm making due with a non-stick coated 12 incher that's safe in the oven. Any wide, slope sided pan will do.

This is the kind of thing that’s infinitely simple but can vary from day to day. Weather affects it. Occasionally it will rise less up the sides and be thicker in the middle. That's cool, just different. But the ideal pancake is thin, rises high on the sides and gets golden and crunchy on the edges. Once done, you slide it onto a large platter-it will deflate a bit-and slice like a pizza. Hmmm...just thinking about it makes me think I might have to go make one for lunch...

Tip 1: Get your oven mitts out and keep them in an obvious spot-if you have to set the pan down between steps, lay the mitt near or even across the handle-you really, really don’t want to accidentally forget that that pan is hot!!! Take my word on this one!

Tip 2: Home alone? Yes, you can make this for one, just divide recipe in half and use an 8 inch pan. That is, if you don’t think you can eat the 12 incher all by yourself...

Mama Kay's Dutch Baby Pancake

Ingredients:

1/2 cup flour

1/2 cup milk

2 eggs

Pinch of nutmeg (I grate it fresh-the flavor’s a bit stronger that way)

4 Tb. butter (or a good butter substitute, like I Can’t Believe It’s Not Butter)

1/4 cup powdered sugar

Half a lemon, cut in 3 wedges

Preheat oven to 425 degrees. Add all the butter to your 12” slope sided skillet (don’t use the straight sided kind, you need that slope!) and put the pan in the oven to melt the butter.

While the butter melts (watch that it doesn’t burn!) combine all the flour, milk, eggs and nutmeg together in a bowl and mix well. You can do this by hand with a whisk, No need to get the mixer out.

By the time you’re done mixing, the butter should be melted and bubbly. If you had to take it out early, pop the pan back into the oven just long enough to get the butter bubbly around the edges. You don’t want to burn it-so keep an eye on it, but you want it very hot. It really does make a difference how well the pancake rises.

Pour your batter into the pan with the butter-just pour it in, don’t mix or swirl, it will spread on its own. Put pan in the oven and bake for 15 to 20 minutes. Once it rises and begins to turn golden brown, pull it out of the oven and set on a heat proof surface for the next step. (I lay a towel beside my sink and hang the pan half over the sink--it’s neater, and this is a messy step).

Squeeze lemons all over the pancake(pick out any seeds that drop in)-be sure to get it up on the tops of the edges-you can even rub the squeezed lemon on the edges. Then sprinkle liberally with powdered sugar. If you like sweet, use the whole 1/4 cup, if not, maybe a bit less. I like sweet, but you knew that, right?

Put the pan back in the oven (USE YOUR MITTS!!) for 5 more minutes. This will cook your sugar and syrup into patches of crunchy crystallized sugar bits along with a syrupy lemon sugar. Remove from oven and slide onto a large platter. You may need to slip a spatula under it to release any parts that stick. Cut like a pizza, serve (with fruit is nice) and enjoy. Don’t forget the champagne!

Saturday, February 5, 2011

Zippy Cornbread in a ‘Jiffy’!


Cornbread is one of those things that I’ve never bothered to figure out how to make because it’s just so darned easy to make from a box-and it tastes great every time. I figured I couldn’t improve on that. Well, as you will see with this recipe, I stand corrected, but I get to keep my box!

I spotted Giada De Laurentiis whipping up a speedy batch on her show last week and noticed she was using the same mix I use, but naturally, being a professional, she didn’t stop there. She added scallions, mozzarella and stuffed green olives to the mix. It looked great, and if it sounds like your kind of cornbread, here’s the link to follow Giada’s directions:

http://www.foodnetwork.com/recipes/giada-de-laurentiis/scallion-and-mozzarella-cornbread-recipe/index.html

I, however, thought I’d rather use a stronger flavored cheese, and maybe green olives ought to stay where they belong, in martinis. So naturally, I had to tweak this recipe and the result went great with the Crockpot chili I made from Alison’s recipe on her blog. Don’t have that? Here’s the link:

http://crockpotcookery.blogspot.com/

Okay, back to this recipe, and feel free to mix it up a bit on your own, this is one recipe that’s fun to play with and hard to screw up.

Zippy Cornbread in a ‘Jiffy’

Ingredients

1 box cornbread mix (think ‘Jiffy’)

1/4 cup buttermilk (if you don’t have butter milk, use 1/4 cup milk, with a dash of vinegar added. Pour it into a small oven proof container and put it in the oven until you see it’s starting to curdle-presto! buttermilk...or a good substitute.)

1 1/2 Tb. unsalted butter, melted

1 large egg

1/4 cup chopped cilantro

1/4 cup chopped green onions

1/ 2 cup grated sharp cheddar cheese

Mix together the cornbread mix, buttermilk , eggs and melted butter in a large bowl. Use a fork so you won’t be tempted to over mix. Once that’s done, add the cilantro, green onions and cheddar cheese.

I like to make muffins, so at this point, I’d spoon into muffin cups. If you like your cornbread in a pan, then do your own thing! I’d grease the pan first, though. This dough is clumpy and lumpy...that’s okay, it sorts itself out once it starts cooking.

Cook muffins in a 400 degree oven for appx. 15 minutes, or until golden brown on the top. Ditto if you are making it in a pan, though you might need a few extra minutes there.

That’s it! You are gonna be amazed at how easy that was, and I’ll bet you are already thinking of other things you could put in these bad boys. Great job!

Saturday, January 29, 2011

Tales From the Dark Side...of My Kitchen!


It’s no secret I love to cook, but I’m the last one to say that I’m a perfect cook!In fact, I probably make more than my share of boo-boo’s in the kitchen, sometimes really ugly, extremely distasteful ones too!

In part, this may be because I’m allergic to following a recipe...exactly. I like to think of recipes as ‘suggestions’, and the more I respect the cook who wrote them, the more closely I may follow them. I am comforted by the knowledge that even those folks have screwed up royally more than once. Ina Garten, aka The Barefoot Contessa, is one of my favorites. She knows her way around a recipe and generally, I have good fortune following her guidelines. But Ina is on the record that she never serves a new recipe to unsuspecting diners until she’s made it at least three or four times herself.

Now, Ina lives in the Hamptons, so I’m assuming she can afford that luxury, but me, well, I can’t buy four or five times the necessary ingredients just so I can perfect the dish first, not to mention practicing for three days to make one meal! I’ve got other stuff to do...like pay my utility bills! So you might say I make my mistakes ‘in real time’.

Therefore, if I’m going to offer up my recipe tips, I feel it’s only fair I come clean about a few of the lessons I’ve learned the hard way, so I’m going to include the occasional tale from the dark side of my kitchen.

I can cover a lot of ground just by telling you that for years I couldn’t make cookies without burning at least one sheet of them. This is nobody’s fault but my own. The recipes pretty clear on not overcooking, and common sense tells me I can’t leave cookies in the oven forever without dire consequences...usually involving the smoke alarm.

But truly, the reason this happened over and over is because I had a tendency to wander. Maybe I’ve got a bit of ADHD. The last sheet was in the oven, mixing bowl was washed, cookies tucked into a baggie or jar (not to mention some I might have consumed...) and well, the garden needed weeding or a column needed writing or work was calling. I’d only be a minute, just gonna get this little thing done--BEEP! Smoke alarm and burned cookies. It took years, and I still fail occasionally, but I learned the hard way that you aren’t done till you’re done. I still wander, but usually not as far.

I’ve learned that you can save yourself a lot of grief by reading ahead in a recipe. Case in point, an apple torte that appeared lovely on the cover of Bon Appetite but was a test to make and tasted even worse (Honestly, I hold a particular ingredient in the recipe, 'dry white wine', in this case chardonnay, responsible for what ended up being a hideous aftertaste, so really, do you blame me for messing with recipes?).

Anyway, piece of cake!...or torte, I thought. Until I got to the point where I’d peeled the stuffing out of the inside of two large loaves of French bread yielding over 8 cups of moist bread crumbs. I dumped them on a cookie sheet and stuffed them into the oven to dry out , ground up some hazelnuts, peeled the 2 pounds of apples called for in the recipe (well, really three, you know, I like more apples in a tart) and then came up short when I read the crust directions.

They called for THREE cups of breadcrumbs.What that-- Didn’t I just disgorge EIGHT cups from two loaves of French bread? Nowhere did it call for the remaining five cups. Why on earth did they have me do that? I reread the recipe; no clue. I checked the recipe online; no different. I was so frustrated (and frankly, the rest of the recipe wasn’t going too well either) that I wrote a pointed letter to the recipe editor at Bon Appetite asking what was up with this recipe. Geez!

Finally, I returned to the kitchen where I took at closer look at my drying bread crumbs. Funny, they didn’t look the same. They looked like...less. Duh! Drying breadcrumbs shrink. I had about three and a half cups, just over what the recipe called for. Darned if those professionals didn’t know what they were talking about. Of course, it would have been nice if they’d given a girl a clue, but I guess they figured that would be insulting my culinary intelligence, such as it was. Probably why they also never answered my letter.


Tuesday, January 18, 2011

Spaghetti Bolognese


There’s nothing like spaghetti with Bolognese sauce on a chilly winter night...or a pleasant summer evening, for that matter. Particularly this recipe, which is so scrumptious I like to make double batches so I’ll have some to freeze. Okay, first, in case you are clueless (we all are at least once about everything, right?) it’s pronounced bow-la-naze...or close enough. It’s basically a meat sauce but really, it’s so much more. The combination of ingredients creates a wonderfully complex mĂ©lange of flavors...ahhh...it tastes really, really good!

This recipe started out on Emeril Lagasse’s website and has trickled down to my Yellow Folder (favorite recipes) relatively intact! Naturally, I had to tweak a thing or two. My husband says I’ve never met a recipe I could follow....he’s so funny, but he’s probably also right!

So, a few TIPS before we begin, or course:

**Food Processor: Yes, you can chop and dice you’re way by hand through all these veges if you like-I have, but not everyone finds that sort of activity as therapeutic as I do. Strangely, some find it tedious. All these veges are ready in seconds(or thereabouts) with a food processor. And yes, you can also use that Slap Chop if you sprung for one of those.

**I love Barilla Spaghetti with this-not the Thin Spaghetti, the regular spaghetti is thin enough. It’s perfect, really.

**I make this in a very large frying pan with deep sides. If you don’t have that, a Dutch Oven/stock pot works fine.

Okay, if you want to compare to Emeril’s original recipe, here’s the link:

http://www.foodnetwork.com/recipes/emeril-lagasse/linguine-bolognese-recipe/index.html

Spaghetti Bolognese

Ingredients (all this stuff is going into the same pan..except the spaghetti and parmesan):

6 slices of bacon (Emeril likes pancetta too, but really, who has that sitting around?)

1 1/2 cups chopped white onion (yes, you can use yellow or even red, but it will be completely different! Okay, no, not really... it won’t make much difference, I just like the white onions here. )

1 1/4 cups finely chopped carrots (if you’re trying to keep the kids from knowing there are veges in here, make it super fine, but otherwise it’s nice if you can still tell there are carrots!)

3/4 cups finely chopped celery (ditto the above!)

Salt and Pepper to taste...start with a half teaspoon each and add more later if you like-pace yourself, there’s plenty of salt in the other ingredients and you don’t want to end up with too much, because there’s not going back , baby!

1 lb. lean ground beef (think 90/10)

1 lb. ground pork

1/2 cup Riesling or Pinot Grigio (I’d avoid Chardonnay; it has a bitter taste that I find does not play nice in recipes. Emeril prefers white wine vinegar, but this is so much better!)

1 1/2 Tb. minced garlic

1 and a half small 3 oz. cans of tomato paste

1 Tb. sugar (just a bit of sugar cuts the acidity and brings out the tomato taste.)

3 cups beef broth (if you make this yourself with bouillon, rather than buying it ready-made, be sure not to make it too strong or you’ll risk overdoing it on the salt.)

Combine:

3/4 cup milk and 3/4 half and half and set aside

Spaghetti

Parmesan

Once you have all these ingredients chopped, measured and ready to go, it’s just a matter of going through the steps to a really wonderful meal!

Okay, Let’s Cook!

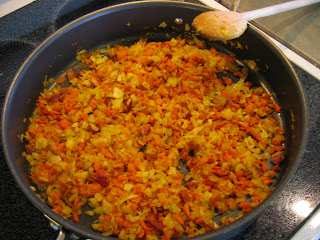
Cook the bacon in your large pan until crisp. Set the bacon aside on a paper towel to dry and meanwhile, add the onion, carrots and celery to the grease, along with the salt and pepper and cook on medium until the veges are tender and beginning to brown in spots. Don’t overdo it!

Scoop the cooked veges into a dish and set aside, then add the ground beef and pork, and crumble up the bacon and add to the pan. Stir to break it up as fine as you can and brown it evenly.

Add to the meat: wine, garlic, and tomato paste and cook for 2-3 minutes. Then add the veges back in with the meat and cook a couple minutes more.

Add the beef broth and bring to a boil, then lower heat and simmer 15 minutes. Now add about a third of your milk mixture and simmer 15 more minutes. Repeat this process until you’ve added all the milk. The sauce will get thicker and creamier with every addition.

Meanwhile....heat the water for the pasta. During that last 15 minute interval you can set out your dishes, prepare the pasta, grab the parmesan-and a nice baguette with some butter would be good too. Add pasta to suit to you dish, scoop a generous amount of sauce on top and sprinkle with parmesan. That’s it, no need to add a salad unless you want to. I assure you, this is a meal all on its own--Enjoy!