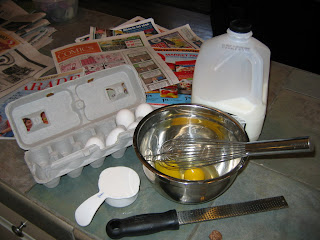
How to read these blogs....

HOW TO READ THESE BLOGS...

In most cases, I don't write the recipes, I tell you how it went, what to be aware of, how to make them or, maybe even make them better. Sometimes I just want you to understand why I came to the decision to toss the puppies! That said, reviewing the recipe as you read my blog should be the most enlightening way to make sense of it all. It definitely will answer questions and help you avoid the same mistakes I made....and I always make some. Error goes hand in hand with the trial part of the process. Embrace it! Because you can't avoid it. Errors are the 'cracked eggs' of the soufflé. Now let's have some fun...

(fyi YELLOW FOLDER recipes are 'Keepers'...watch for the YF tag accompanying these recipes)

Friday, February 25, 2011

Let There Be Cake...and Frostings, Too!


I know what you’re thinking. I’ve raised three boys and I’ve made a lot of cakes over the years, and I’m still using boxed cake mixes?! Yes, and I’m not ashamed to admit it. And yes, this is the first Tinker Bell cake I’ve ever made, but when your granddaughter turns three-it’s time for a serious ‘little girl’ kinda cake. And the little girl in me sure enjoyed making it!

Despite the challenge of living at altitude (6000ft), I have braved the ‘from scratch’ cakes, and I’m pow-wowing with the experts in the hopes of bringing you a somewhat reliable version in the near future; chocolate, of course. Scratch cakes come with a wonderful density and more complex flavor than anything in a box can promise. But those boxes can be counted on to bring you consistent enough results, the kind you need to give you a smooth, flat surface for decorating with fairies, dump trucks, gummy worms...whatever your little one’s heart desires!

Still, I draw the line at the cake. There’s no excuse to ever buy a Can-o-Frosting again! Frostings (aka Icing) are so simple to make and so much more delicious to eat. So back away from that can, here are a couple of great do-it-yourself frostings and some ideas for putting them to good use!

If you’ve ever watched Semi-Homemade with Sandra Lee (http://www.semihomemade.com ), you get the idea. We take the easy part-the box-and then we do a little something ourselves to create a cake that makes you forget about that New Year’s resolution and spring for a second slice.

The Tinker Bell cake started with a boxed Strawberry Cake mix. If you live at altitude, follow the high altitude directions. If you can’t find Strawberry Cake, or you’re feeling lucky, here’s a quick do-it-yourself version which is probably even better:

Alternate Strawberry Cake: Using one box of White Cake mix, reduce the liquid by 1/3 cup, add all other ingredients called for, PLUS 1 cup strawberry preserves and 1/8 tsp. red food coloring. I would recommend also making some altitude adjustments per the box, if that’s necessary, as this one can be tricky. Just remember, when the center of a cake falls a bit, that’s what icing is for!

Okay, now let’s make it really special with homemade frostings. These two versions will serve you for many purposes. The Cream Cheese is awesome on Carrot Cake as well, and the Chocolate is standard practice for topping all my brownies. It’s also good between graham crackers, in a pinch.

Cream Cheese Frosting:

Mix the following ingredients all together in a bowl until smooth and soft:

8 oz. cream cheese, softened (leave it out of the fridge for about 30 minutes)

6 Tb. butter (unsalted is great, but not necessary)

4 cups powdered sugar

2 tsp. vanilla

1 tsp. lemon juice (cut a wedge and give it a good squeeze into the bowl-that should do it-watch for seeds!)

1-2 Tb. milk-Optional. Add this only if you feel your frosting is a little too thick to spread smoothly.

Creamy Chocolate Frosting: (this comes to us from Anne Byrn’s cookbook, Chocolate From theCake Mix Doctor. (http://www.cakemixdoctor.com/) Byrn has literally written the book-or books on tweaking boxed cake mixes to make wonderful creations that exceed any box’s expectations!) This is enough for brownies, but for a cake, I’d double it.

Mix the first 4 ingredients-start slow, or you’ll have cocoa powder flying everywhere!

3 Tb. butter (room temperature)

3 Tb. unsweetened cocoa powder

1 Tb. light corn syrup

1 tsp. vanilla

After you’ve mixed these together (it will be kinda thick) add and mix until smooth and spreadable:

1 cup powdered sugar

2 Tb. milk

Tinker Bell Cake:

For the Tinker Bell cake, I used the chocolate frosting for the center (use it all-you want a thick layer), and then frosted the rest of the cake with the cream cheese frosting. I reserved about 1/2 cup of the cream cheese for decorating. I added green and yellow food coloring to the reserved frosting and then piped those little vines here and there. If you don’t have piping equipment, put it in a small baggie and snip off one bottom corner-instant piping tool!

I used pre-made store bought candy flowers at the end of each vine, and a colorful silk flower for Tink to sit upon. I cut the stem down to about 2 inches and slipped it into a cut off piece of a straw before sticking it into the cake. Tink’s small friends easily sat in the frosting, but Tink was a bit tippy...a problem that was solved by a drop of hot glue on her little behind before she sat down on the flower. (Yes, it peels off later and no fairies were hurt in the making of this cake!)

That’s it! We served the cake with Chocolate Chip Ice Cream-Yummm! Now go, make cake! J

Monday, February 14, 2011

Aunt Kay’s Dutch Baby Pancake (YF)


This recipe came from my Aunt Kay who lives in Hawaii. She recommends that these be preceded by 'well iced Bloody Mary's' and served with 'chilled champagne'! One of the many reasons why I love 'Mama Kay'!

When I was little we used to go to a Swedish restaurant that made something like these for Sunday breakfast. They filled the middle with apples, which is fine. But I'm a purest and love the simplicity of powdered sugar and lemon. The Original Pancake House makes a Dutch Baby that's very much the same, and comes with an accompaniment of whipped butter, lemon and powdered sugar: http://www.originalpancakehouse.com/phm_specialties2.html Makes me wonder if they were spying on my Aunt all those years ago...hmm. However, if you are hooked on those pancakes but don't have an hour to wait for a table on Sunday morning, this is the recipe for you!

I've been making this recipe for a very long time-long enough to do in a couple of favorite pans! The ideal pan is a 12 inch stainless steel--no non-stick coatings or plastic handles. All-Clad makes the pan of my dreams: http://www.all-clad.com/collections/Stainless-Steel/frypans.htm?index= ...but until my ship comes in, I'm making due with a non-stick coated 12 incher that's safe in the oven. Any wide, slope sided pan will do.

This is the kind of thing that’s infinitely simple but can vary from day to day. Weather affects it. Occasionally it will rise less up the sides and be thicker in the middle. That's cool, just different. But the ideal pancake is thin, rises high on the sides and gets golden and crunchy on the edges. Once done, you slide it onto a large platter-it will deflate a bit-and slice like a pizza. Hmmm...just thinking about it makes me think I might have to go make one for lunch...

Tip 1: Get your oven mitts out and keep them in an obvious spot-if you have to set the pan down between steps, lay the mitt near or even across the handle-you really, really don’t want to accidentally forget that that pan is hot!!! Take my word on this one!

Tip 2: Home alone? Yes, you can make this for one, just divide recipe in half and use an 8 inch pan. That is, if you don’t think you can eat the 12 incher all by yourself...

Mama Kay's Dutch Baby Pancake

Ingredients:

1/2 cup flour

1/2 cup milk

2 eggs

Pinch of nutmeg (I grate it fresh-the flavor’s a bit stronger that way)

4 Tb. butter (or a good butter substitute, like I Can’t Believe It’s Not Butter)

1/4 cup powdered sugar

Half a lemon, cut in 3 wedges

Preheat oven to 425 degrees. Add all the butter to your 12” slope sided skillet (don’t use the straight sided kind, you need that slope!) and put the pan in the oven to melt the butter.

While the butter melts (watch that it doesn’t burn!) combine all the flour, milk, eggs and nutmeg together in a bowl and mix well. You can do this by hand with a whisk, No need to get the mixer out.

By the time you’re done mixing, the butter should be melted and bubbly. If you had to take it out early, pop the pan back into the oven just long enough to get the butter bubbly around the edges. You don’t want to burn it-so keep an eye on it, but you want it very hot. It really does make a difference how well the pancake rises.

Pour your batter into the pan with the butter-just pour it in, don’t mix or swirl, it will spread on its own. Put pan in the oven and bake for 15 to 20 minutes. Once it rises and begins to turn golden brown, pull it out of the oven and set on a heat proof surface for the next step. (I lay a towel beside my sink and hang the pan half over the sink--it’s neater, and this is a messy step).

Squeeze lemons all over the pancake(pick out any seeds that drop in)-be sure to get it up on the tops of the edges-you can even rub the squeezed lemon on the edges. Then sprinkle liberally with powdered sugar. If you like sweet, use the whole 1/4 cup, if not, maybe a bit less. I like sweet, but you knew that, right?

Put the pan back in the oven (USE YOUR MITTS!!) for 5 more minutes. This will cook your sugar and syrup into patches of crunchy crystallized sugar bits along with a syrupy lemon sugar. Remove from oven and slide onto a large platter. You may need to slip a spatula under it to release any parts that stick. Cut like a pizza, serve (with fruit is nice) and enjoy. Don’t forget the champagne!

Saturday, February 5, 2011

Zippy Cornbread in a ‘Jiffy’!


Cornbread is one of those things that I’ve never bothered to figure out how to make because it’s just so darned easy to make from a box-and it tastes great every time. I figured I couldn’t improve on that. Well, as you will see with this recipe, I stand corrected, but I get to keep my box!

I spotted Giada De Laurentiis whipping up a speedy batch on her show last week and noticed she was using the same mix I use, but naturally, being a professional, she didn’t stop there. She added scallions, mozzarella and stuffed green olives to the mix. It looked great, and if it sounds like your kind of cornbread, here’s the link to follow Giada’s directions:

http://www.foodnetwork.com/recipes/giada-de-laurentiis/scallion-and-mozzarella-cornbread-recipe/index.html

I, however, thought I’d rather use a stronger flavored cheese, and maybe green olives ought to stay where they belong, in martinis. So naturally, I had to tweak this recipe and the result went great with the Crockpot chili I made from Alison’s recipe on her blog. Don’t have that? Here’s the link:

http://crockpotcookery.blogspot.com/

Okay, back to this recipe, and feel free to mix it up a bit on your own, this is one recipe that’s fun to play with and hard to screw up.

Zippy Cornbread in a ‘Jiffy’

Ingredients

1 box cornbread mix (think ‘Jiffy’)

1/4 cup buttermilk (if you don’t have butter milk, use 1/4 cup milk, with a dash of vinegar added. Pour it into a small oven proof container and put it in the oven until you see it’s starting to curdle-presto! buttermilk...or a good substitute.)

1 1/2 Tb. unsalted butter, melted

1 large egg

1/4 cup chopped cilantro

1/4 cup chopped green onions

1/ 2 cup grated sharp cheddar cheese

Mix together the cornbread mix, buttermilk , eggs and melted butter in a large bowl. Use a fork so you won’t be tempted to over mix. Once that’s done, add the cilantro, green onions and cheddar cheese.

I like to make muffins, so at this point, I’d spoon into muffin cups. If you like your cornbread in a pan, then do your own thing! I’d grease the pan first, though. This dough is clumpy and lumpy...that’s okay, it sorts itself out once it starts cooking.

Cook muffins in a 400 degree oven for appx. 15 minutes, or until golden brown on the top. Ditto if you are making it in a pan, though you might need a few extra minutes there.

That’s it! You are gonna be amazed at how easy that was, and I’ll bet you are already thinking of other things you could put in these bad boys. Great job!